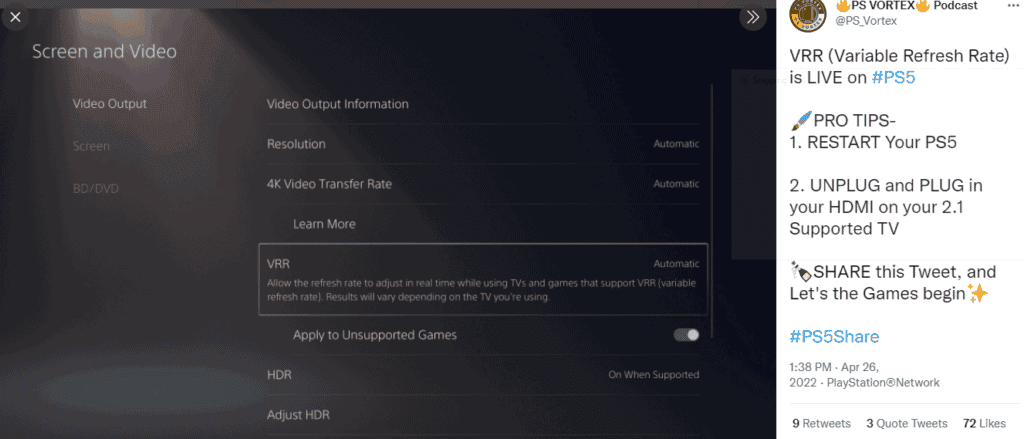
Earlier today, Sony announced on its official blog that the PlayStation 5 platform will support variable refresh rates (VRR) this week. According to the latest news from netizens, now you only need to restart the Sony PlayStation 5 and re-insert the HDMI 2.1 cable on the TV to turn on the VRR function without waiting for the system update.

Sony says that on HDMI 2.1 VRR, compatible TVs and PC monitors will dynamically sync the monitor's refresh rate to the Sony PlayStation 5 console's graphics output. VRR greatly reduces or eliminates visual distortions such as tearing. Many Sony PlayStation 5 titles will have a smoother playing experience thanks to fast scene rendering times, sharper image quality, and reduced input lag.
In the next few weeks, the Sony PlayStation 5 versions of these games will receive game patches that support VRR support:
- "Astro's Playroom"
- Call of Duty: Vanguard
- Call of Duty: Black Ops Cold War
- "Death Cycle"
- Destiny 2
- Devil May Cry 5 Special Edition
- "Dust 5"
- "Fall of the Gods"
- Spider-Man Remake
- Spider-Man Miles Morales
- Ratchet and Clank: Time Jump
- Resident Evil: Village
- "Little Tina's Wonderland"
- Rainbow Six: Siege
- Tribes of Midgard
Sony PlayStation 5 DualSense gamepad supports firmware updates on Windows 11/10 PC
Sony Playstation officially announced that the PS5 DualSense handle now supports firmware updates on the PC side. In addition, the PC side only needs to download the "Firmware Updater for DualSense Wireless Controller". After the installation starts, connect the controller to the computer and follow the instructions to update without connecting to the PS5.
Update Wireless Controller Firmware
The performance of the DualSense wireless controller can be better by updating the firmware. Be sure to update the firmware to the latest version before use. Furthermore, to update the firmware, a Windows computer and the application [Firmware Updater for DualSense Wireless Controllers] are required.
System Requirements
If you are updating the firmware for the first time, you will also need to install the application on your Windows computer. The next time you need to update the firmware, start with step 3.
1. Download [Firmware Updater for DualSense Wireless Controllers ] and save it to your desktop or other location.
2. Run the installation file and follow the on-screen instructions to install the application. During installation, you may see requests to download additional software required to use [Firmware Updater for DualSense Wireless Controllers]. To download the software, follow the on-screen instructions.
3. Launch [Firmware Updater for DualSense Wireless Controllers].
4. Connect the controller to the Windows computer using the USB cable and follow the on-screen instructions to start the update.
Do not shut down your Windows computer or disconnect the USB cable during the update process. However, when the update is complete, there will be a message. Select [OK] to end the update process. In addition, it is important to note that you can only update one controller's firmware at a time. To update the firmware of multiple controllers, you need to update each controller individually.


Place comments
0 Comments
You are currently seeing only the comments you are notified about, if you want to see all comments from this post, click the button below.
Show all comments